By Ashley Smith, Sarah Beth Thompson, and Wesley Porter
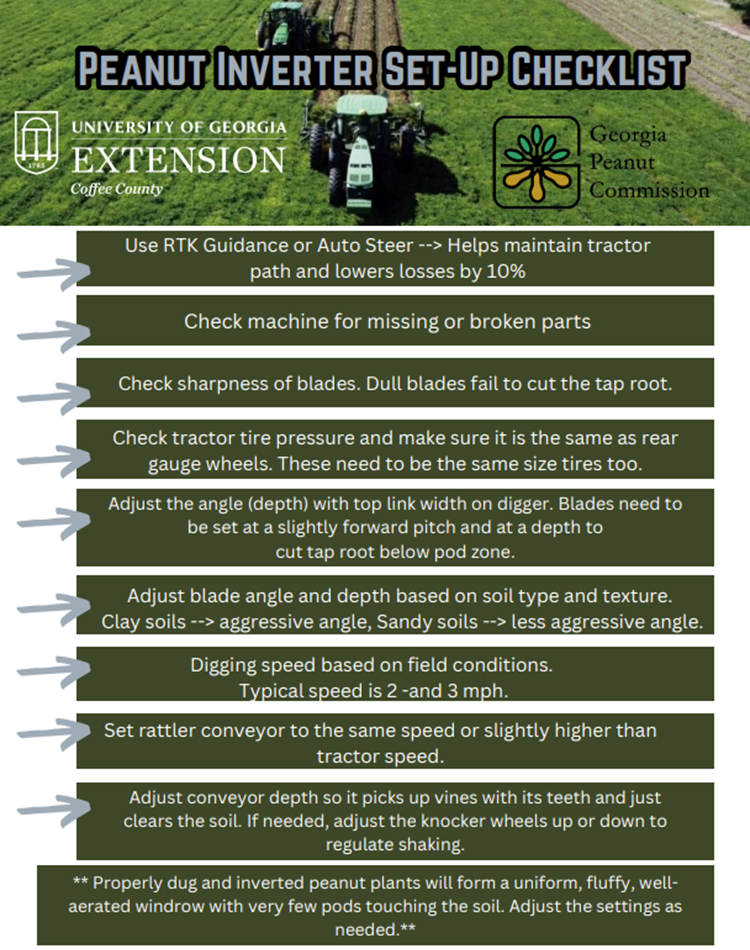
As we discussed last week, we are quickly approaching maturity on peanuts. Now that we are finished(-ing) corn harvest, we should take some time to go through our harvest equipment for peanut and cotton so that we are ready to go when they hit optimum maturity and the weather is cooperative. The goal of this post is to break down the steps of setting up a peanut inverter and what parts to focus on to get it ready as we move into digging season. Below are 8 steps to check over your inverter to help set-up and head-off routine maintenance problems in the field.
Step 1: Start with the Tractor (This is best completed on a level concrete pad.)
- Front weights/ballast are most likely needed
- Rear tires
- Same size? (Different brands may not be exact)
- Same/adequate tire pressure
- As simple as this sounds I have heard too many stories of inverters not performing correctly and it coming down to a difference in tractor tire pressure. Even small leaks in tires can cause major problems during the day!
- Draft arms/links
- Level to tractor
- Correct hitch pin size, any slack or movement here will be amplified throughout the rest of the inverter and can make it near impossible to set correctly.
- Top link
- Inverter should rest (level) on front tip of blade and rear gauge wheels, if it does not adjust appropriately, then readjust once it the field for final leveling.
Step 2: Rear Gauge Wheels
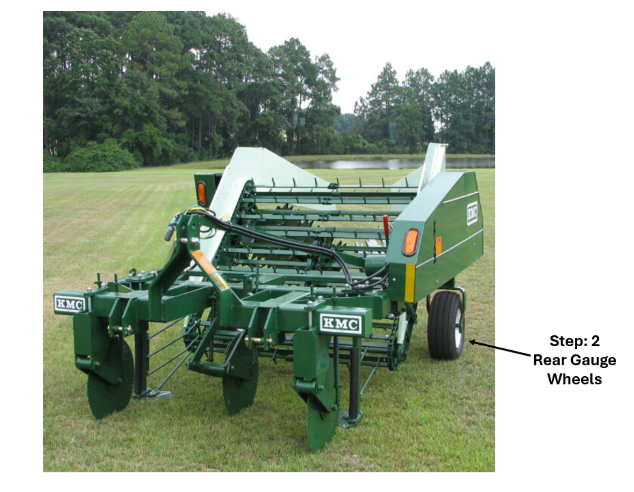
- Check Tire Pressure! Similar to pressure on tractor tires, this is critical for proper depth and level setting
- Usually mounted with one or two holes showing in stem at top
- Adjust for level operation depending on field conditions
Step 3: Blades
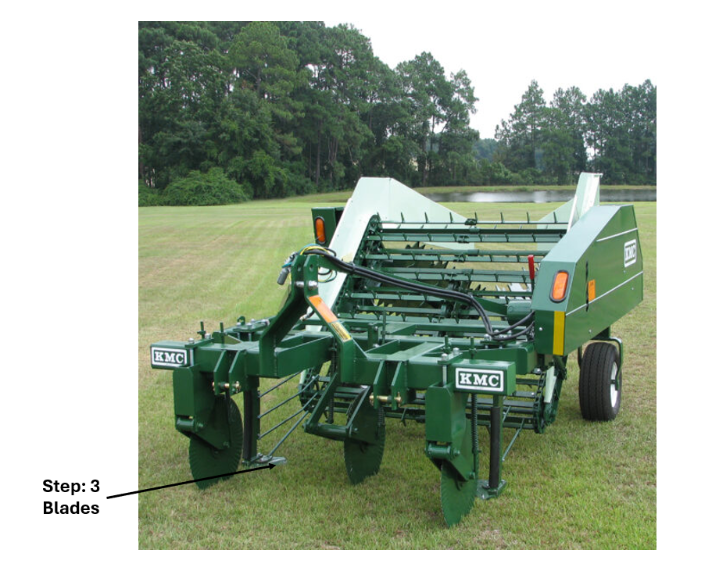
- As we know last season seemed to finish off with dry conditions, meaning the blades were being worn down rapidly, and if you did not change them at the end of the season the inverter is probably due for new blades before you start the 2025 harvest season
- Bevel up or down?
- This is going to depend on soil type, they are typically bevel up, but there are special cases where the blades may need to be inverted
- Plow standard – usually 9 – 13” off the row
- Frogs
- 26” for most conditions (tends to cut cleaner and push less dirt than 30”)
- 30” (for some twin row patterns if needed)
- 26” for most conditions (tends to cut cleaner and push less dirt than 30”)
- 30” (for some twin row patterns if needed)
- Adjust blade pitch to allow ¾” clearance at rear of blade
Step 4: Coulters
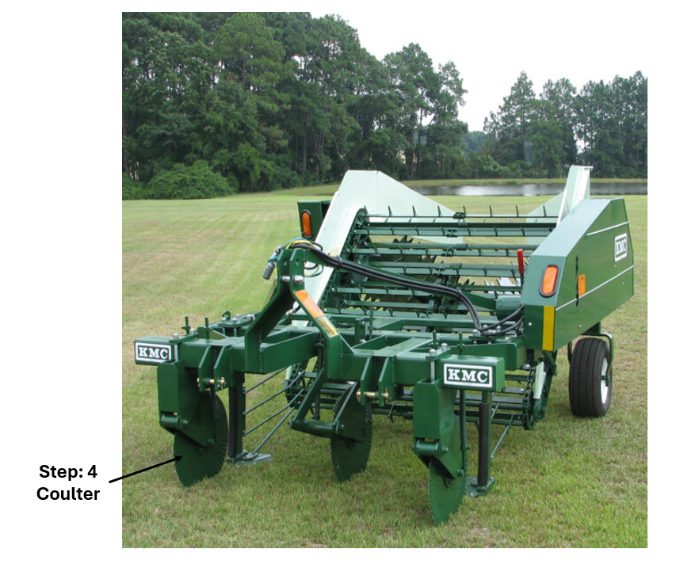
- Check size/diameter of coulters (worn out?)
- Check bearings locked up/loose?
- They should freely spin, but not wobble
- It is critical that the coulters are matched up to the row center
- Check spring tension and operate roughly two to three inches below the blade
Step 5: Rattler Conveyor
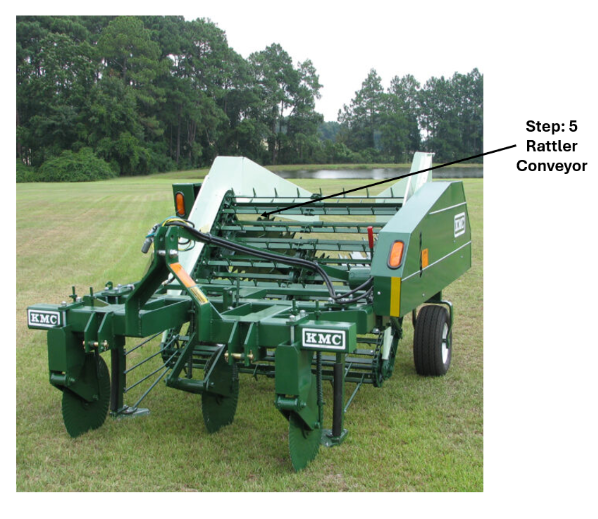
- Bent bars?
- Bars installed backwards, are the teeth pointed in the correct direction?
- Clearance between rattler bars and vine lifters
- Too little clearance will cause bunching
- Too much clearance will cause vines to drop off and not be picked up
- When plows are at proper depth, rattler conveyer should just clear the ground
- New chains at 2 ¼”, Older chains at 2 ½” (distance from bottom of the rattler frame to the top of the chain)
- Rattler frame parallel to the 45-degree frame member
- Knocker wheels adjust as needed for more or less agitation depending on field conditions
Step 6: Guide Rods
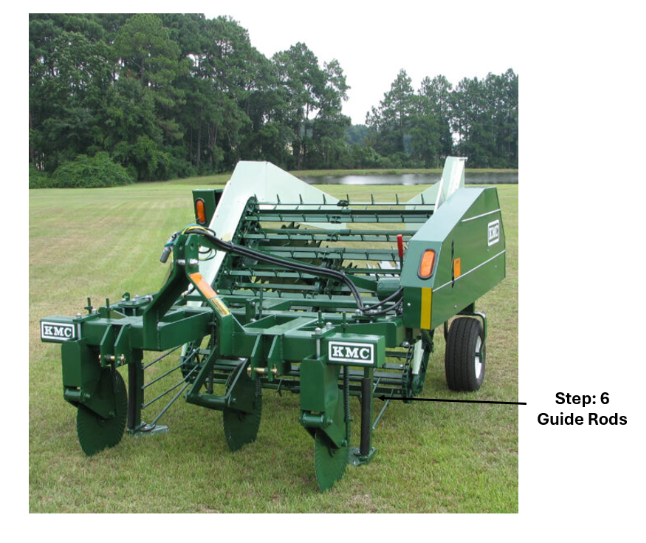
- Factory set
- Look for bent rods or issues with material flow
- May need periodic adjustment
- Measurements in owner’s manual
- Newer machines have a decal showing proper rod location
Step 7: Inverters
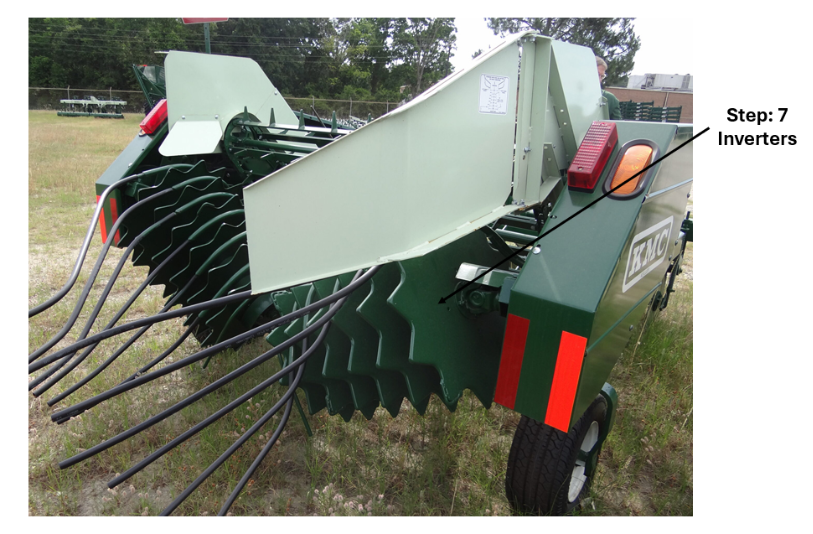
- Belt/chain tension (wear)
- Bearings, universal joints
Step 8: Speed of Operation
- Generally, 2 – 3.5 MPH (may vary below or above this range depending on field conditions)
- PTO speed of approximately 70-75% of rated. The speed of the rattler conveyer should be slightly above ground speed.
- Vary ground vs PTO speed to find that “sweet spot”
- Top drive shaft of both PTO and hydraulic machines should be 100-110 rpm.
Things to watch out for when troubleshooting for issues in the field:
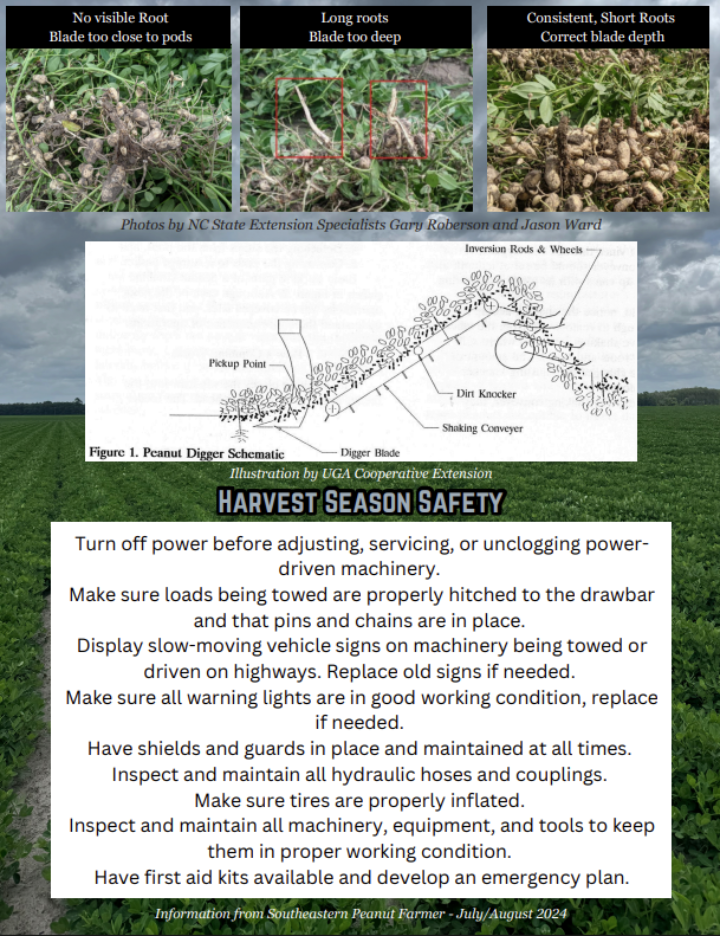
1. Blade depth too shallow.
2. Dull blades. Blades are dull when they do not cut cleanly through the taproot. If they push on the root, they will drag the plant.
3. Vine cutter springs too loose or coulters too dull.
4. Conveyor pickup running too high above the lifter rods.
5. Tractor RPM or hydraulic flow too fast.
6. Vine flow not synchronized with ground speed and conveyor speed.
7. Inverter not precisely aligned with the row (indicated by tap roots leaning left or right)
We hope this helps to have a simple list of things to run through and check before you start to head into the field. Below is a more succinct checklist with images to further demonstrate the steps above: